The Interhaptics SDK is a powerful tool for developers who want to add haptic feedback to their applications. This guide provides step-by-step instructions on how to integrate the Interhaptics SDK into your Unreal Engine project (versions between 4.26 – 5.5) by providing a basic integration example.
To proceed with the integration process, you need to have a basic understanding of Unreal Engine and have it installed on your computer (at least version 4.26). Additionally, you should have the Interhaptics SDK downloaded or cloned from the official repository.
Interhaptics SDK for Unreal is compatibile with major audio middleware for games (WWise, FMod).
If you don’t need to make a build for PlayStation 5, Nintendo Switch or XBox you can install the Interhaptics SDK directly from Fab.com and go directly to Step 3.
Create a Plugins folder: Navigate to your project folder and create a “Plugins” folder at the root level (YourProject/Plugins).
Go inside the Plugins folder and clone the Interhaptics SDK repository, or alternatively download the package from https://github.com/Interhaptics/UnrealEngine_CoreSDK/archive/refs/heads/master.zip and extract it in the Plugins folder.

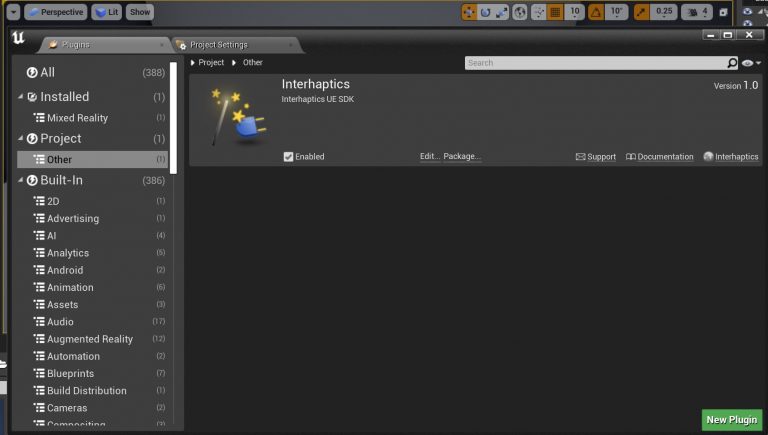
Open your Unreal Engine project, and the engine will prompt you to rebuild the Interhaptics modules included in the plugin. Rebuilding might take more than a few minutes with no prompt or timer showing that, so allow the time for the project to restart before re-opening it.

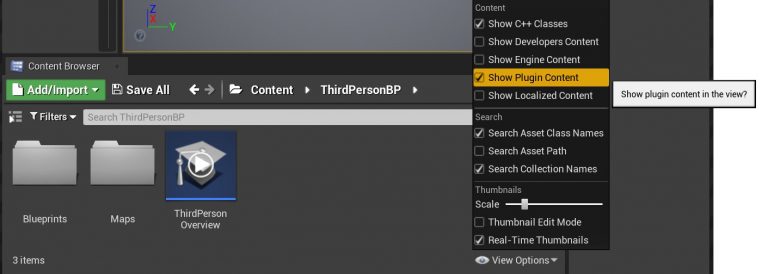
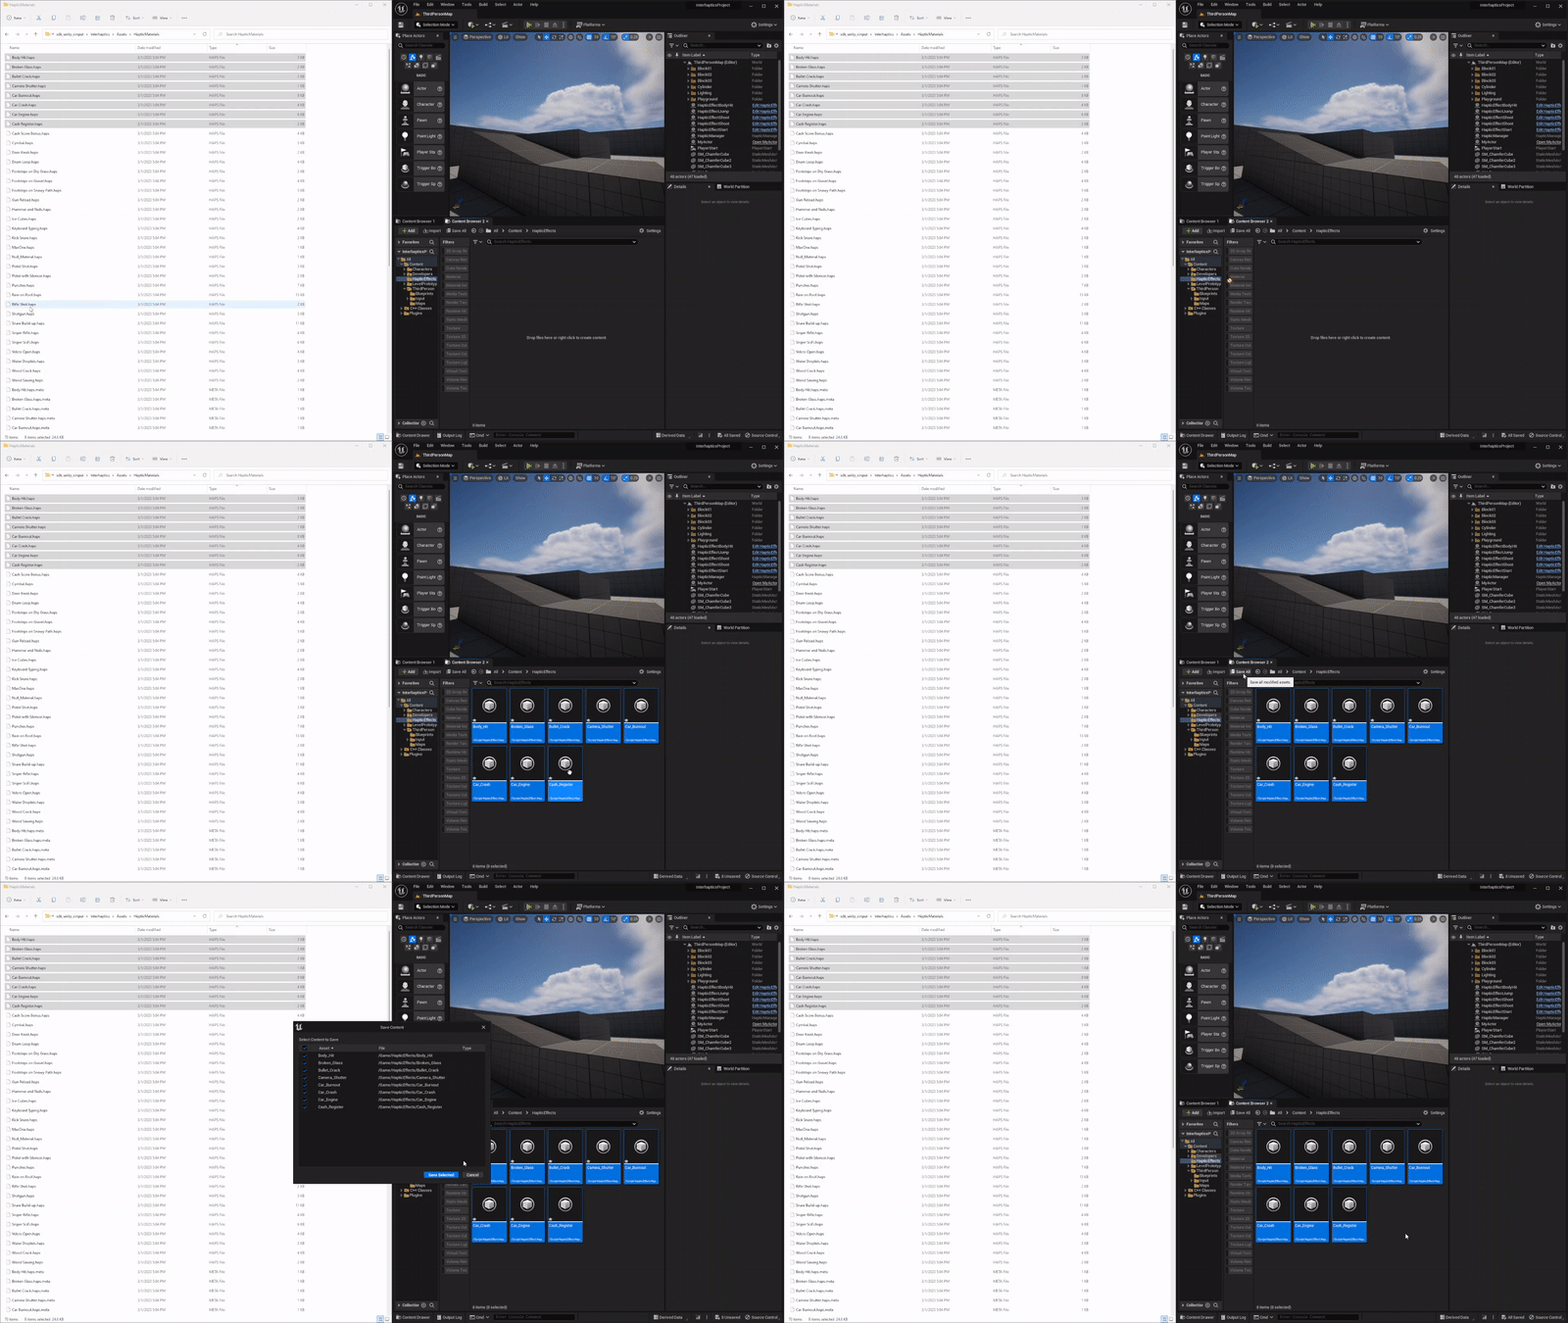
To add new haptic effects (.haps files) created with Haptic Composer, you can simply drag and drop the .haps files from your folder to your Unreal project Content Browser.
If you want to add a modified haps file that has been already imported, re-import it under a different name or delete the .uasset file associated with it.
Enhance your Unity projects with high-definition haptic feedback using the Razer Sensa HD Haptics, supported by Interhaptics Unreal Core SDK version 1.2.0 and above.

SDK Support: Verify that your project is using Interhaptics Unreal Core SDK version 1.3.0 or above to have automatically enabled Razer Sensa HD Haptics support. The Interhaptics Core SDK can be installed via the GitHub link as described in the Getting Started with the Unreal SDK chapter.
Compatible Devices
Razer Sensa HD Haptics is compatible with a variety of Razer Sensa HD Haptics devices
Driver Requirements
For developers which received the devkit, please follow the setup detailed on the Razer Sensa Devkit Github repo. Skip the install of Razer Synapse 4.
Make sure you have the latest version of the Razer Synapse 4 and Chroma apps for necessary drivers.
Guide
Refer to the standard documentation in the Interhaptics Unity SDK for guidance on adding haptic effects and preparing your project for Nintendo platforms. (Code documentation / No-Code documentation)
This guide provides step-by-step instructions for setting up custom haptic effects for an GameInput/XInput controller using the Interhaptics Unreal SDK.
To get started, simply repeat the first four steps outlined in the Getting Started chapter. Then, follow these instructions for a no-frills, no-code implementation:
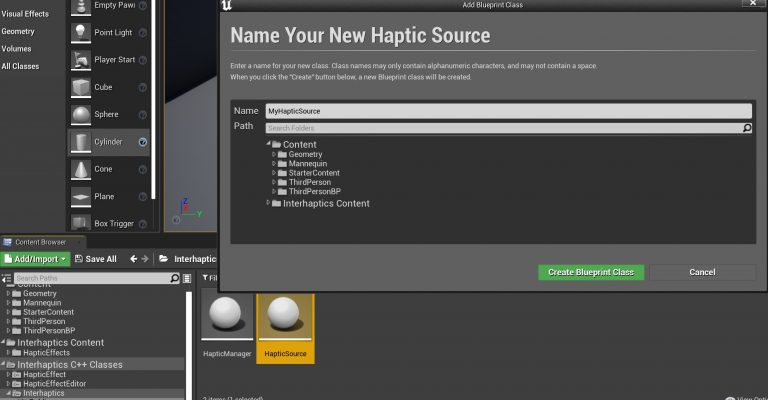
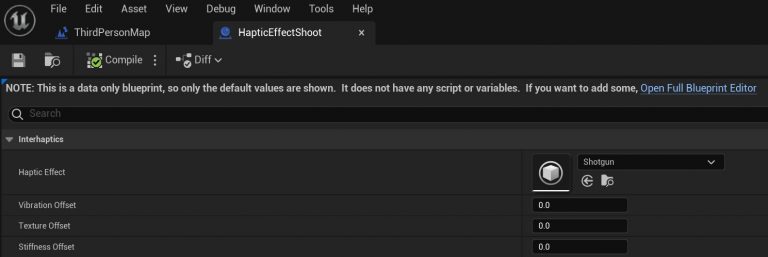
Create a new Blueprint of the HapticSource type (HapticEffectShoot in this example) and add it to the Viewport. Assign a haptic effect from the library or create your own using Haptic Composer.
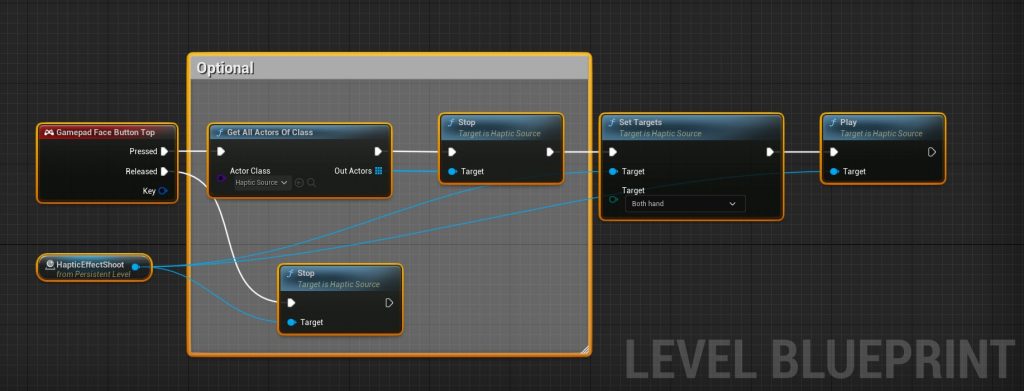
Open the Level Blueprint and drag the HapticEffectShoot Actor from the Viewport to the Event Graph. Add a Gamepad Event to the HapticEffectShoot Blueprint. In this example, we use the Gamepad Face Button Top (Y button) as the input for the event.
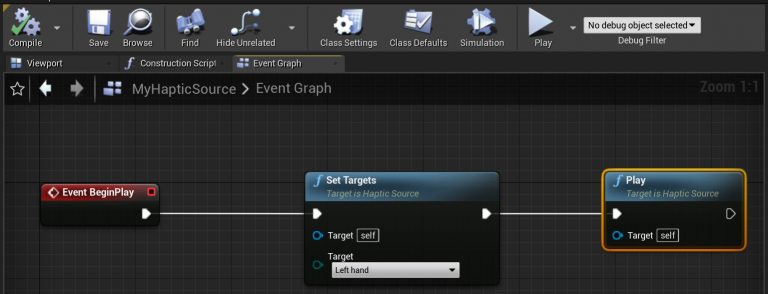
In the Pressed state, stop all present Haptic Sources from playing (a good practice for clear haptic effects). Set the Target on “Both hands” to play on both sides of the controller and execute Play.
In the Released state, you may stop the Haptic Source if desired (optional).
You can view the resulting blueprint in the image below.
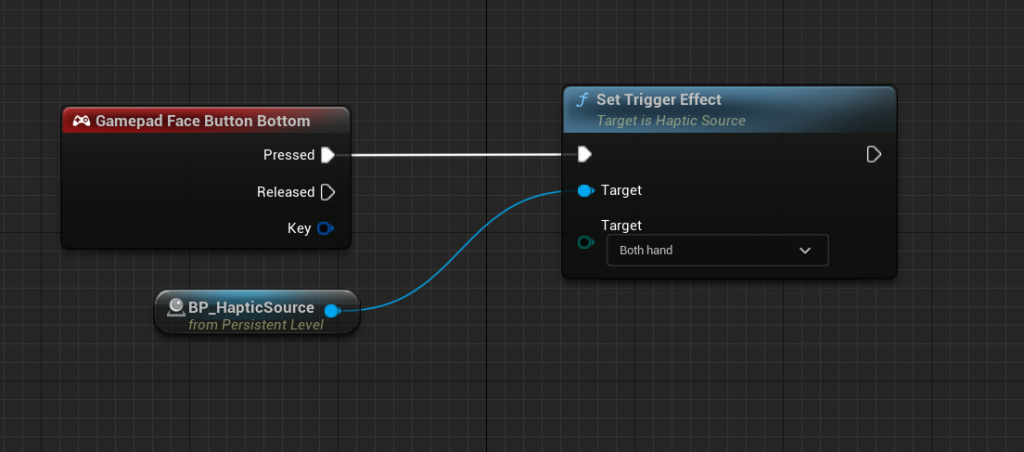
If you prefer to use Enhanced Input, you can replace the Gamepad Event with an Enhanced Input action. The example below shows the same haptic effect implementation on the Jump action with the A(XBox controller) button binding.

Requirements:
The Interhaptics SDK add-on for the PS5® console and PlayStation VR2® can be requested through the Tools and Middleware Directory on DevNet. However, there are certain conditions, mentioned above, that must be met before obtaining access to the Interhaptics SDK for PlayStation 5.
Note: At the moment, adaptive trigger support is not available in Unreal Engine.
Request the PlayStation 5 add-on for the Interhaptics Unreal Engine and Unity SDK through DevNet. This will enable you to add haptic effects and build for the PlayStation 5 console and, in case of VR titles, for the PlayStation VR2.
Once you are granted access to the GitHub private repositories you can go to Step 2 and beyond.
* If the Interhaptics PlayStation 5 SDK is 1.2.0 or earlier simply replace the whole Interhaptics Core SDK as these versions contain the Interhaptics Core SDK inside. To upgrade to a newer version, replace this with an Interhaptics Core SDK superior to 1.4.0 and add the Interhaptics PlayStation 5 Add-on version 1.3.0 or later as a module to the core plugin directory according to the steps below.
*This step applies to the Interhaptics Core SDK 1.4.0 or later in combination with the PlayStation 5 Add-on 1.3.0 or later (where the add-on functions as a module of the Core SDK).
Install the Interhaptics Core SDK according to the steps related here. The PlayStation 5 Add-on integration has to be cloned or added in the Plugins folder of your the Interhaptics Core from the provided link. https://github.com/Interhaptics/UnrealEngine_PlayStation5_SDK
Verify that Advanced Vibration Mode is enabled. This can be done by adding the following text to the PS5Engine.ini file in the Platforms/PS5/Config directory if you are on 5.0 or beyond:
[SonyController] bAdvancedVibrationMode=true
On Unreal Engine 5.0-early access and prior, add the following text to the PS5Input.ini file in the YourProject/Config/PS5 directory
[/Script/Engine.InputSettings] AdvancedVibrationMode=True
Clone this repository into <InterhapticsPluginFolder>/Source. After importing it, the folder structure should look like this:
					InterhapticsPluginFolder
Interhaptics.uplugin
/Source
	/HapticEffect
	/HapticEffectEditor
	/Interhaptics
	/ProviderGameInput
	/ProviderRazerSensa
	/SDKPS5Folder
		/Private
		/Public
		/HAR-libraries
		/IHPS5Build.cs
(You must be logged in with the same email which has been granted the GitHub access, otherwise this link will give you a 404 error).
You should follow the standard installation process described in the Getting Started with Unreal SDK chapter (from Step 2 onward).
Add the following settings in the Modules list of Interhaptics.uplugin to enable the support of the PS5 platform for Interhaptics.
					,
    {
        "Name": "IHPS5",
        "Type": "Runtime",
        "LoadingPhase": "Default",
        "WhitelistPlatforms": [ "PS5" ]
    }
To add haptic effects (vibrotactile) to your Unreal Engine project, follow the steps described in this section of the documentation. Being cross-platform, the vibration haptic effects added in the GameInput/XInput example will be rendered as well on the PlayStation 5 console.
The PlayStation VR2 can have effects triggered on the hands (controller) or on the head (through the haptic band on the headset). To trigger the haptic effects omn the head simply set the target of the haptic effect on the head instead of the default target (which is set as hands).
On top of that, PlayStation 5 can benefit from setting haptic effects to its adaptive triggers. This can be done by using the Stiffness perception when creating the haptic effect in Haptic Composer. The stiffness created is the force profile that will be applied to the adaptive trigger. Below you can see a quick implementation using Blueprints in Unreal Engine.
To add custom haptic effects (from audio files or starting from scratch), you can use the videos from the Haptic Composer section as a guide.
For further assistance or support, please refer to the official Interhaptics online documentation and Discord where we will happily provide the answers needed.
“PlayStation” is a registered trademark or trademark of Sony Interactive Entertainment Inc.
The Interhaptics SDK add-on for Nintendo platforms is available through the Nintendo Developer Portal in the section Middleware -> User Interface. Before you can request access to it, ensure you meet the above requirements.
Installation and Integration Steps
Step 1: Request the Interhaptics SDK for Nintendo
Step 2: Install Interhaptics Core SDK
Step 3: Add the Nintendo Switch Add-on to the Core SDK
https://github.com/Interhaptics/UnrealEngine_SwitchSDK
					InterhapticsPluginFolder
	Interhaptics.uplugin
	/Source
		/HapticEffect
		/HapticEffectEditor
		/Interhaptics
		/ProviderGameInput
		/SDKSwitchFolder
			/Private
			/Public
			/HAR-libraries
			/IHSwitchBuild.cs
Add the following settings in the Modules list of Interhaptics.uplugin to enable the support of the switch platform for Interhaptics
							{
			"Name": "IHSwitch",
			"Type": "Runtime",
			"LoadingPhase": "Default",
			"WhitelistPlatforms": [ "Switch" ]
		}
Step 4: Implementing Haptic Effects and Building for Nintendo Platforms
For further help or queries, please consult the official Interhaptics online documentation and join our Discord community for tailored support and answers.